
Introduction:
Auto Layout, the powerful and flexible system provided by Swift for defining the layout of your iOS app’s user interface, is a blessing for developers striving to create adaptive and visually appealing designs. However, it’s not uncommon to run into layout woes – those frustrating moments when elements on the screen aren’t behaving as expected. In this blog post, we’ll explore common Auto Layout problems in Swift and provide a comprehensive guide on how to troubleshoot and fix them, ensuring your app’s layout is as seamless as your code.
1. Understand the Basics:
Before diving into solutions, it’s crucial to have a solid understanding of Auto Layout basics. Familiarize yourself with constraints, the Auto Layout engine, and how views respond to different devices and screen sizes.
2. Identify and Prioritize Issues:
Start by identifying the specific layout issues. Are elements overlapping? Is there unexpected spacing? Prioritize problems based on their impact on the user interface.
3. Use Constraints Wisely:
Ensure that constraints are correctly set for each UI element. Common mistakes include missing constraints, conflicting constraints, or improper priority settings. Use Interface Builder or programmatically define constraints in Swift to create a robust layout foundation.
swift
// Example: Programmatically adding a constraint let constraint = NSLayoutConstraint(item: view1, attribute: .leading, relatedBy: .equal, toItem: view2, attribute: .leading, multiplier: 1.0, constant: 8.0) view.addConstraint(constraint)
4. Debugging Tools in Xcode:
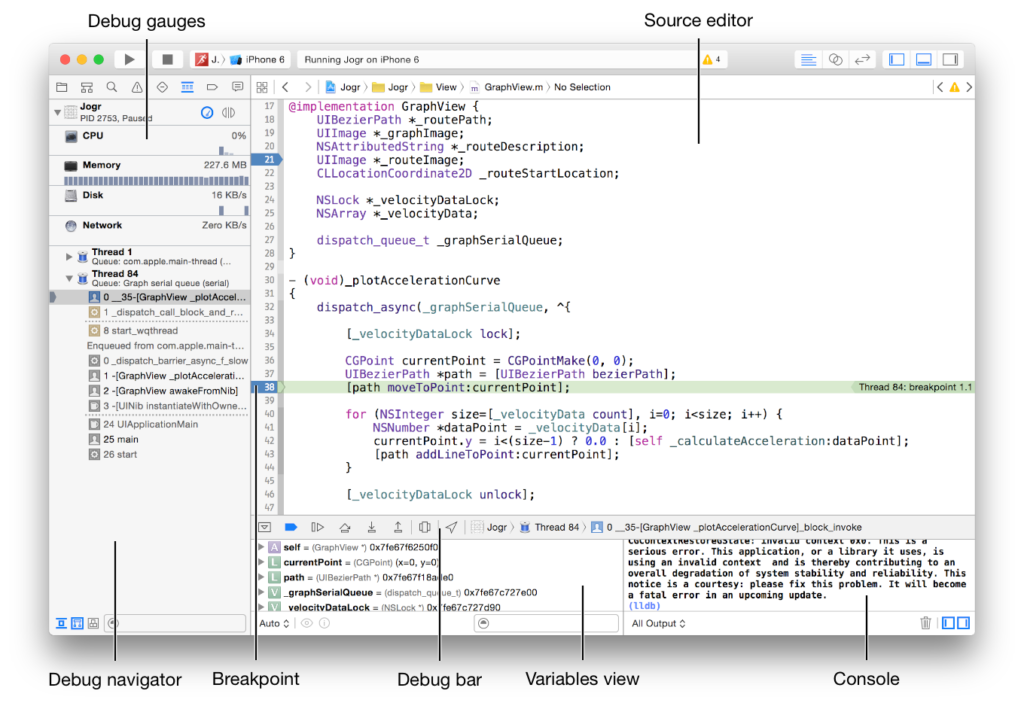
Take advantage of Xcode’s debugging tools to identify and resolve layout issues. The View Debugger, available in the Debug navigator, provides a visual representation of your view hierarchy and constraints. Use this tool to inspect views, frames, and constraints during runtime.
5. Update Frames and Layouts:
If your UI is not updating as expected, ensure that you’re triggering the layout updates appropriately. Call layoutIfNeeded() on the relevant view or its superview to force an immediate layout update.
swift
view.layoutIfNeeded()
6. Autoresizing Masks:
When dealing with legacy code or transitioning from manual frame-based layouts to Auto Layout, be mindful of autoresizing masks. These can affect how views resize and reposition when their superview’s bounds change.
swift
view.autoresizingMask = [.flexibleWidth, .flexibleHeight]
7. Ambiguity and Compression Resistance:
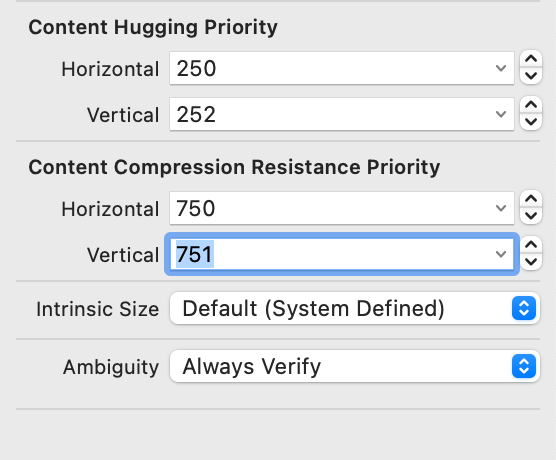
Address layout ambiguity by ensuring all views have sufficient constraints for their position and size. Adjust the compression resistance and content hugging priorities to guide Auto Layout in making layout decisions when there’s not enough space.
swift
// Example: Adjusting compression resistance priority view.setContentCompressionResistancePriority(.required, for: .horizontal)
8. Testing on Different Devices:
Auto Layout problems may surface differently on various devices and orientations. Regularly test your app on different simulators or physical devices to ensure a consistent user experience.
9. Update Constraints Dynamically:
In some cases, you might need to update constraints dynamically based on runtime conditions. Utilize outlets to update constraint constants or activate/deactivate constraints as needed.
swift
// Example: Updating a constraint constant constraint.constant = newValue view.layoutIfNeeded()
Conclusion:
Navigating the world of Auto Layout in Swift can be challenging, but armed with a solid understanding of its principles and equipped with troubleshooting strategies, you can overcome layout woes and create visually stunning and responsive user interfaces. Remember, a well-designed layout not only enhances the user experience but also reflects the craftsmanship and attention to detail that defines exceptional iOS app development. So, embrace the challenges, debug with diligence, and transform your layout woes into victories!